
Connecting to the blockchain with web3.py
A Beginner’s Guide to Writing Your First Web3 Python Script

Introduction
Welcome back!
In the previous posts, we established the groundwork by setting up our Python environment and exploring some essential tools and libraries.
Today, we're going to take a significant leap forward: connecting to the Ethereum blockchain using web3.py.
In this post, we’ll start by briefly revisiting what web3.py is and its capabilities.
Then, we'll guide you through the process of setting up a connection to an Ethereum node, creating your first Web3 script, and executing basic interactions with the blockchain.
By the end, you'll have hands-on experience and a solid foundation to build more complex applications in future lessons.
If you missed it, make sure to check my last post where I explain the necessary steps you need to be able to follow what’s next!
What is web3.py?
web3.py is a Python library for interacting with Ethereum. It is designed to be the Python equivalent of Ethereum's JavaScript library web3.js, offering a comprehensive collection of tools to connect to and interact with the Ethereum network.
Key Features and Capabilities
1. Connecting to Ethereum Nodes: web3.py can connect to any Ethereum node that supports JSON-RPC, which is the standard protocol used for interfacing with the Ethereum network.
2. Smart Contract Interaction: One of the most powerful features of web3.py is its ability to interact with smart contracts. Developers can use the library to deploy new contracts or connect to existing ones, call functions, and listen for events.
3. Transaction Management: web3.py provides robust tools to create, sign, and send transactions.
4. Utilities and Helpers: The library includes various utilities that make it easier to work with Ethereum's data types and networks. These include converters for units (like converting ether to wei), hashing functions, and support for working with Ethereum's unique hexadecimal data formats.
Setting Up Your Development Environment
Before we begin interacting with the blockchain, it’s crucial to ensure that your development environment is correctly set up.
You can find the tutorial about installing python, libraries and virtual environment in my last post.
Quick Checklist:
Python: Confirm that Python is installed by running
python --version pip: Check if pip is installed by executing
pip --versionVirtual Environment: Set up a virtual environment to keep your project dependencies isolated. Refer to my last post to create and activate it.
Web3.py: Make sure you already installed the latest version of web3.py via pip by running
pip install web3Connecting to the Blockchain
To interact with the blockchain, you need to connect to a node. This section will guide you through obtaining access to a node and setting up a provider in web3.py.
Ethereum Nodes and Providers
A node is a software instance that participates in the network, maintaining the ledger's state and processing transactions. Providers are services that allow you to interact with an Ethereum node.
How to Obtain Access to a Node
To quickly start without setting up your own node, you can use services like Quicknode or Alchemy, which provide access to Ethereum networks via a RPC.
For this tutorial purpose we will use a public RPC you can find at
The first script
So you are in your project folder (aka root folder), you installed all required libraries and activated the virtual environment, now what?
Create and rename a new file with .py extension and write the following code.
Importing the Web3 library.
from web3 import Web3This statement loads the Web3 class from the web3 module, which provides all the functionalities needed to interact with the Ethereum blockchain.
Assigning to the
rpc_urlvariable the URL of our RPC.
Choosing a reliable RPC provider or setting up your own is crucial for the stability and security of your applications.
rpc_url = "https://eth.llamarpc.com"Creating a Web3 instance and connect to the rpc_url we set up in step 2.
w3 = Web3(Web3.HTTPProvider(rpc_url)) This line creates a new Web3 instance using an HTTP provider.
This provider takes the RPC URL as an argument and uses it to send HTTP requests to the Ethereum node specified by the URL.
This is how your application communicates with the Ethereum blockchain.
Checking if our connection was successful:
if w3.is_connected():
    print("Connected to Ethereum blockchain!")
else:
    print("Failed to connect, check your RPC URL.")
The if w3.is_connected(): condition checks if the Web3 instance has successfully established a connection with the Ethereum node.
This verification step is vital because it confirms whether your application can interact with the blockchain.
If the connection fails, it's typically due to an incorrect RPC URL or network issues.
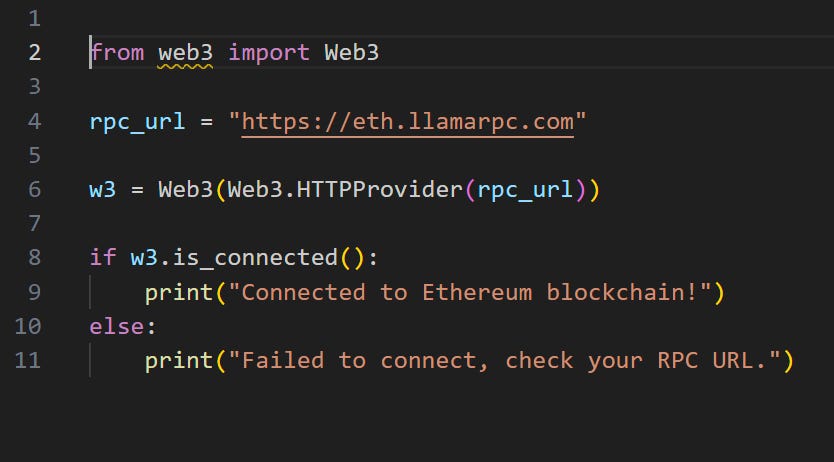
Once you are done, your script should looks like this:
Running Your First Web3 Script
Now that you've written your first script to connect to the Ethereum blockchain, it's time to run it and see the result.
How to Run the Script
Save the Script: Ensure that your script is saved in a file with a
.pyextension, eg., ‘ethereum_connect.py’.This should be done in the root of your project folder where your virtual environment is activated.
Open Your Terminal: Navigate to your project directory if you're not already there. You can do this by opening a terminal or command prompt and using the
cdcommand to change directories. For example:cd path/to/your/project
Run the Script: With your virtual environment activated (ensure that your terminal prompt shows the virtual environment, if not, activate it by running
source venv/bin/activateon macOS/Linux or.\venv\Scripts\activateon Windows), execute the script by running:python ethereum_connect.pyNote: activating the virtual environment is optional but always a good practice.

Checking the Output
After running the script, watch the terminal output. If everything is set up correctly, you should see:
Connected to Ethereum blockchain!
If you see an output like:
Failed to connect, check your RPC URL.This means the script was unable to establish a connection. This could be due to several reasons such as an incorrect RPC URL, the node being down, or network issues.
Troubleshooting Common Issues
Environment Not Activated: Make sure your virtual environment is activated, as it contains all the necessary libraries installed for the script to run.
Typos in the Script: Check for any typos or errors in your script’s code, especially in the RPC URL.
Summary
Congratulations on creating your first python script!
It may look silly now, but you learned to set up your Python environment for Web3, connected to the Ethereum blockchain using web3.py, and executed your first script to check the connection.
These foundational will be the critical as you progress towards more complex blockchain interactions.
Now that you have the tools and know-how, I encourage you to experiment further.
Try modifying the script to connect to different Ethereum test networks like Rinkeby or Ropsten.
See if you can query blockchain data such as retrieving the current gas price or the latest block number. Experimentation is key to deepening your understanding and becoming more proficient in blockchain development.
Preview Next Content
In our next post, I’ll show you how to fetch more info after connecting to the blockchain and, maybe, how to perform some basic interactions with smart cotnracts.
I will also share some conversations with GPT 4 to show you how I approach prompting to write web3 related code.
Supplementary Materials
For those eager to learn more and expand their knowledge, here are some resources that can help:
Ethereum Developer Portal: Ethereum.org Developer Resources
Web3.py Documentation: Web3.py Official Documentation
Consider using ChatGPT for immediate guidance on technical issues.
If you still encounter any difficulties or need clarification, feel free to comment, and I'll do my best to assist you.
~ Gval